How to Clean Window Film: A Comprehensive Guide
Window treatments are a household must-have—and not just for their aesthetic benefits.
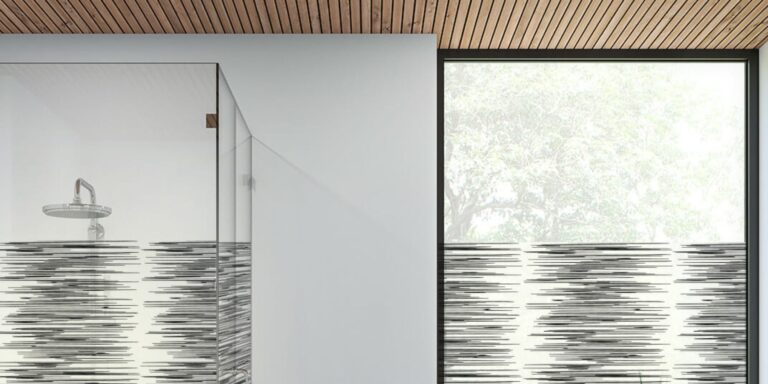
Window film covers the windows of your home. They provide privacy, control how much light comes into the rooms, ensure UV ray protection, and reduce heat and solar glare. They can even reduce heating and cooling costs by keeping cold air and summer heat outside.
Invest in window film to get these many benefits and more.
Why Window Film? Why Not Other Treatment Options?
Homeowners have many options to decorate their windows, some better than others. Here are some common types of window treatments:
Shades
Shades come in a variety of materials and can be motorized or manual.
The most common shades are:
- Cellular shades: Also known as “honeycomb shades,” they trap air between the window and the room, so they are great for insulation.
- Roller shades: They provide stellar privacy and light filtering properties without sticking out like an eyesore. However, they obstruct the view.
- Roman shades: These combine the benefits of drapery with the functionality of shades and come in bamboo and fabric options. They block light and your view of the outdoors.
- Solar shades: Also known as “window sunglasses,” they provide UV protection. They are great for areas that receive a lot of sunlight.
While shades are an excellent investment, they require regular maintenance to maximize their function.
Panel Tracks
Panel tracks are a type of sliding window panel made with fabric. They’re mounted to the wall and are a versatile choice for tall picture windows or sliding doors.
These installations must be maintained carefully, or the dust that accumulates within them could make sliding the doors difficult.
Shutters
Shutters are typically made of wood, adding architectural appeal to your space. You can tilt them open to bring light into the room, although they won’t completely block light when closed.
Treated Glass
Treating glass with window films minimizes the fading of your furniture and other decor to increase their lifespan. They also provide infrared heat reduction to reduce the risk of heat transfer from the outside into your home. It reduces glare, which puts less strain on your eyes, so you can enjoy relaxing activities like watching TV with ease.
In addition, window treatments provide privacy and enhance your safety. In the event of a robbery or a manmade disaster, these installations make it much harder to shatter the glass. They do all this with a coating typically made of Polyethylene Terephthalate (PET).
Blinds
Blinds can be angled to give you complete control over how much light you want in the room. You can opt for one of these types:
- Venetian blinds: Made of metal, wood, or vinyl. They offer privacy on varying levels. However, they’re prone to collecting dust.
- Pleated blinds: They sit flat at the top of the window. Some options give you easy control over light.
- Vertical blinds: They offer privacy and block light.
Natural wood could be a hit-or-miss as it tends to warp. Stick with faux wood for top-tier durability, a beautiful aesthetic, and moisture-resistant properties.
As you can tell, we have a clear winner: window films. They provide a plethora of benefits while being low maintenance and maintaining durability. If you’re worried that cleaning your windows will become a chore, you’ll be happy to know that the process is pretty straightforward.
We’ll shed light on how to clean window film, but first, note the following:
Window Film Care Begins With Correct Installation
Do you want to get the best possible ROI from your window film? Then, follow this step-by-step installation guide:
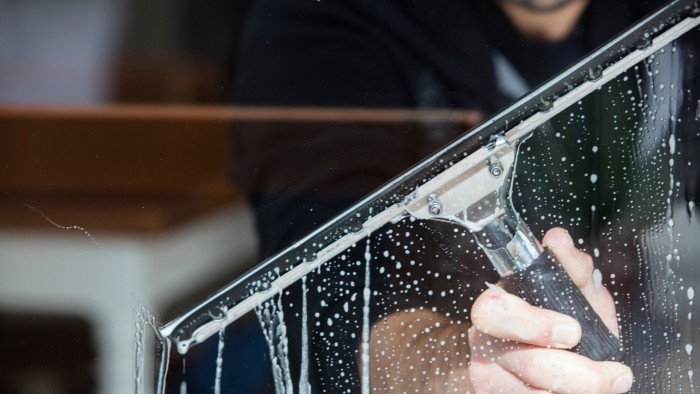
Clean the Glass
Use a household glass cleaner to remove all traces of dirt and other impurities from the window. A solution of bay shampoo and bottled water should also do the trick.
When you’ve scraped away all the grime, use a rubber squeegee or a soft cloth to dry the glass.
Once you’re sure your window is as clean as possible, spray the cleansing solution one last time.
Remove the Backing
Pull the protective backing sheet from the film. If it’s transparent, you can use two pieces of clear tape for the same.
When that’s done, spray the exposed surface liberally with the solution you used to clean the windows.
Install the Film
Once the window and film are covered in the soapy solution, place the film on the glass. Start at the top, and watch it practically glide into place. The wet surfaces create a “slip,” allowing you to move the film easily into position without any signs of resistance.
Next, push all remaining moisture to the edge of the frame using an application squeegee. Use firm strokes to move the bubbles from the top to the center, then from the center to the side.
Finally, use a clean paper towel to soak up the excess moisture, and you’re all set.
Now, the Most Important Part: Let Your Window Film Cure
Your window film will require a dry-out time to adhere and cure.
How long does it take?
Well, that depends on the weather conditions.
If it’s cold out or the temperature is mild with minimal sunshine, expect a long dry-out time. But if you have ample sunlight, the film may dry in a much shorter time frame.
Depending on the film type and thickness, you should avoid cleaning it for 30 to 60 days post-installation to give it enough time to bond to the glass.
Initially, the film may appear cloud-like or hazy. Don’t fret; it will clear up within a couple of days. Do not pop any bubbles that may appear during the drying process. This can compromise the film’s integrity, causing water to seep within the surface. Once this happens, your film will not stick correctly.
How To Clean Window Film: A Comprehensive Guide
Over time, window films can accumulate dirt and dust, become scratched, and lose their initial aesthetic appeal. Hence, it’s crucial to establish a regular cleaning routine to keep your window film in its prime. This also ensures it will last for years to come.
Here’s how you can do that:
- Use soft materials to clean the window film: A lint-free cloth or soft sponge will be the right tool for the job. Keep your movements in the same direction as the cut lines to avoid lifting the edges. Wipe horizontally for the top and bottom and vertically at the sides to keep the window film in place.
- Use the suitable materials for drying the window film: A light rubber squeegee or a clean microfiber cloth eliminates any risk of scratching. Dry the film thoroughly. Don’t leave any trace of water behind, as it could get underneath the film and lead to bubbling.
- Use the right cleaning solution: Glass cleansers will be your first line of defense against dirt, dust, and other impurities. You can also use a mixture of liquid dish soap and water for cleaning. Use it in spray form, as too much soap could leave a streaky residue on the glass.
- Be gentle when cleaning the window film: Treat window film as you would treat glass: with love and caution. Apply gentle pressure to remove dirt and smudges on the film. Too much force could scratch or damage the glass.
Now that you know what to do, let’s look at what you shouldn’t:
- Do not use the same cleaning cloth to clean both sides of the window: Dirt found outside the house tends to be more abrasive than dust from within. Hence, you should not use the same cleaning cloth for both sides of the window. It could scratch up your window film and damage it permanently.
- Do not use coarse tools for cleaning: Bristled brushes, abrasive scrubbing sponges, and coarse paper towels can cause fine scratches to appear on the film—even on ones that are protected with a scratch-resistant, hard-coat finish. Even the tiniest scratches damage the film and reduce its polished look.
- Do not use harsh cleaning products: Ammonia-based products, baking soda, and other harsh cleansers can ruin window film, so it’s best to avoid them.
If you’re unsure what materials to use, do a patch test. This is just like how you would select a new paint color for your walls or a new skincare product to check how it looks. You can apply a bit of product on one corner of the film and see whether or not it leaves any scratches or residue behind. You can use it on the rest of the panel if it has your seal of approval.
In Conclusion
Now that you know how to clean window film to keep it looking great and functioning at its best for years to come, it’s time to realize your window treatment dreams with StickPretty’s collection of window film designs. They’ll give you the best of privacy and protection from the elements while enhancing your interior decor.